DIY Fire Pit For Cheap!
You need:
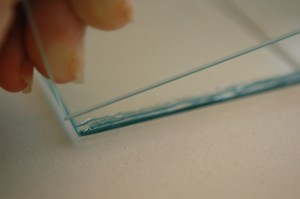
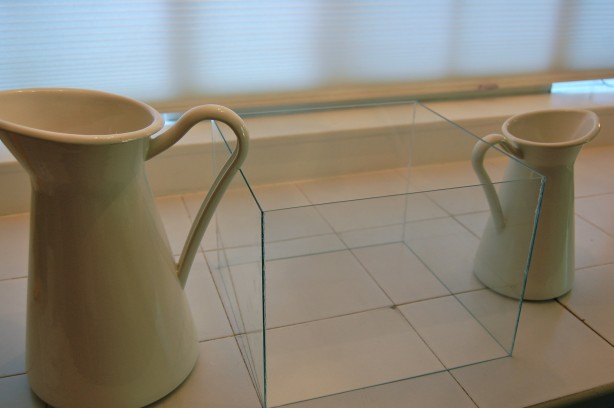
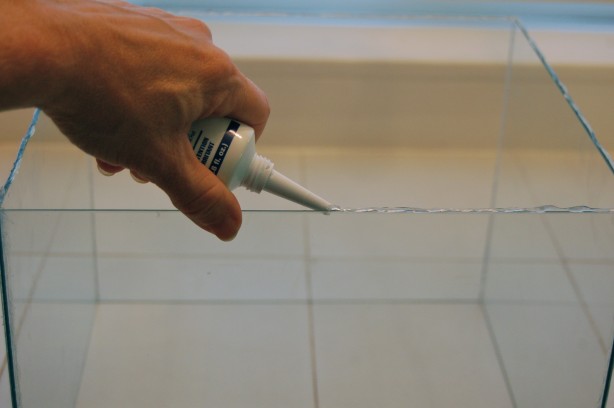
1. After you buy your planter, you need to find cheap frames with glass that will fit around the edges of your planter. I used glass document holders from the dollar store for $1 each.You need to make a glass box. so ... run a thin bead of silicone along the edge of one glass panel. Now you have a box. a glass box. Wasn't that easy? Let the silicone dry for 15 minutes or so. Go have a cookie. Don't be alarmed if your silicone squeezes out like this. clean it up with a razor once it's dried.
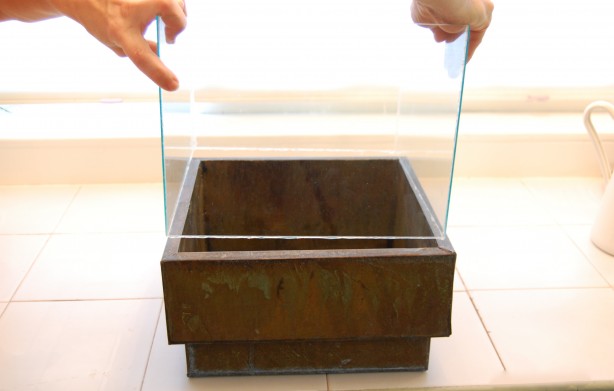
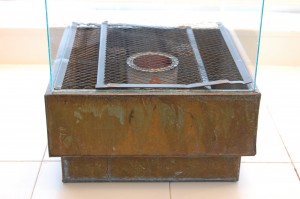
2. Flip the box over then place siliconed edge on top of metal planter, making sure there's enough edge near the centre left over for some metal mesh to rest on it.
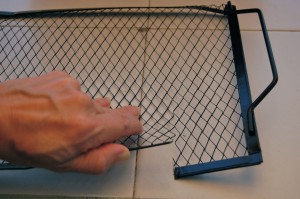
3.Cut a piece of mesh (i used a cheapo grill grate from dollar store) to fit *exactly* inside your glass box. it will rest on the lip of the planter.
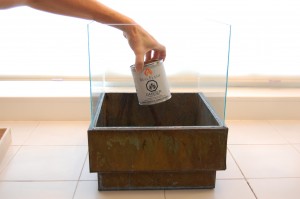
4. Place your opened can of gel fuel in the centre of the planter.
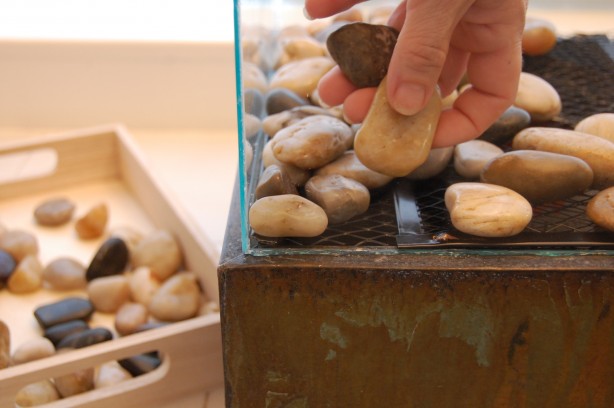
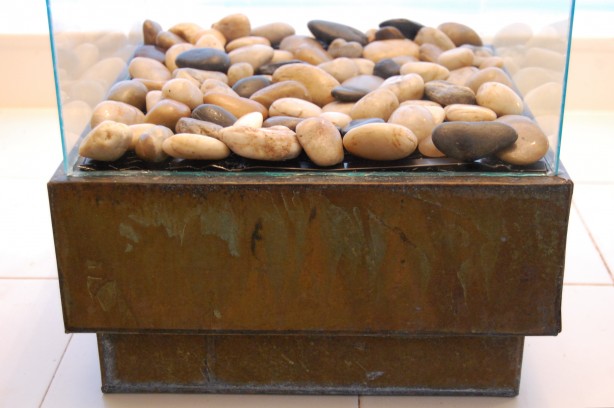
5. Place as much mesh as you need to cover the entire surface of the planter, resting mesh on the small edge of planter you've left inside the glass box.
6. Cover mesh loosely with rocks (you need some space in between the rocks to allow for oxygen so the fire will stay lit).
7. Clear the rocks away from above the gel fuel can and carefully light the gel fuel. i use an advanced technique. i light the end of a piece of spaghetti. whole wheat of course.
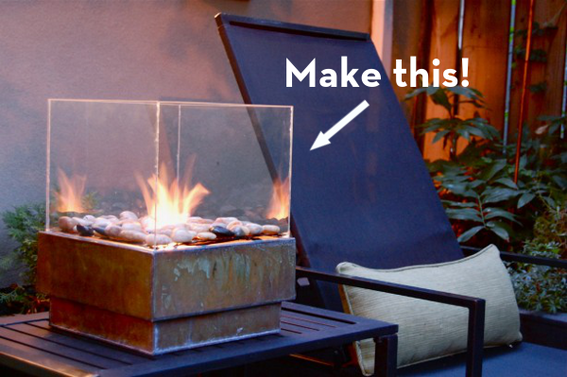
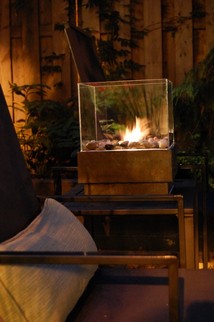
What makes this fire pit so amazing is the glass. The flames reflect against it creating dancing flames all over the place! Before I get to the final pictures with the fire pit in it’s rightful home in my back yard I wanted to let you in on a few tips.
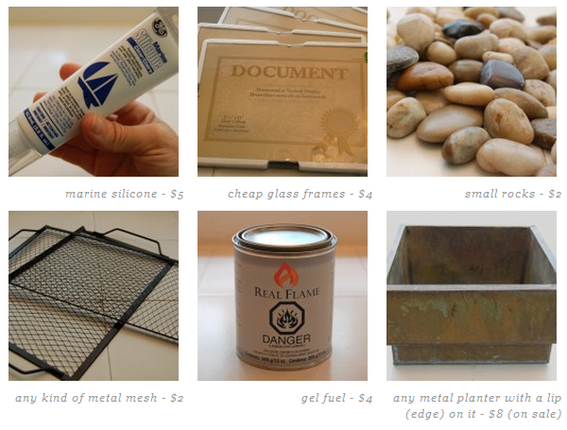
- marine silicone - $5
- cheap glass frames - $4
- small rocks - $2
- any kind of metal mesh - $2
- gel fuel - $4
- any metal planter with a lip (edge) on it - $8 (on sale)
1. After you buy your planter, you need to find cheap frames with glass that will fit around the edges of your planter. I used glass document holders from the dollar store for $1 each.You need to make a glass box. so ... run a thin bead of silicone along the edge of one glass panel. Now you have a box. a glass box. Wasn't that easy? Let the silicone dry for 15 minutes or so. Go have a cookie. Don't be alarmed if your silicone squeezes out like this. clean it up with a razor once it's dried.
2. Flip the box over then place siliconed edge on top of metal planter, making sure there's enough edge near the centre left over for some metal mesh to rest on it.
3.Cut a piece of mesh (i used a cheapo grill grate from dollar store) to fit *exactly* inside your glass box. it will rest on the lip of the planter.
4. Place your opened can of gel fuel in the centre of the planter.
5. Place as much mesh as you need to cover the entire surface of the planter, resting mesh on the small edge of planter you've left inside the glass box.
6. Cover mesh loosely with rocks (you need some space in between the rocks to allow for oxygen so the fire will stay lit).
7. Clear the rocks away from above the gel fuel can and carefully light the gel fuel. i use an advanced technique. i light the end of a piece of spaghetti. whole wheat of course.
What makes this fire pit so amazing is the glass. The flames reflect against it creating dancing flames all over the place! Before I get to the final pictures with the fire pit in it’s rightful home in my back yard I wanted to let you in on a few tips.
- Make sure you buy gel fuel that’s meant for gel fireplaces. Gel cooking fuel will not work because it usually only creates heat, not an actual flame.
- Like I said, if you use a proper gel fuel (Real Flame for example) you can actually use this fire pit indoors. Be careful to place it on heat resistant fabric so it doesn’t scorch your furniture. The metal conducts the flame heat a lot!
- Make sure your rocks are heavy for their size. Rocks that are light are full of air and may explode!
- You can use any metal planter for this. This was on sale, so this is the one I got for this little fire pit experiment. Black metal square planters that are probably on sale at garden centres right now would look fantastic with white rocks.
- The gel cans last for about 3 hours, if you’d like to stop the flame earlier, just place something non flammable over the glass box to snuff out the flame. Cans can be relit at a later date or time. ((As seen on http://www.theartofdoingstuff.com/how-to-make-a-personal-fire-pit-for-cheap/))